DISCOVER THE COURSE

Some course history…

Centenary Park Golf Course has a long history in Frankston, originally formed as the ‘Frankston Municipal Golf Club’ in 1938 and situated in Yuille Street Frankston – on land which is now part of the Frankston Hospital and Pentland Gardens. 

In 1974, the Frankston City Council decided to relocate the course to its current location. Designed by golf professional Bill Clifford. the club was renamed Centenary Park Golf Club in 1986. Centenary Park Golf Course has prided itself on being one of the most accessible courses for the public and the local community, ensuring golf remains a fun and enjoyable experience for players of all abilities. 

COURSE TIPS

Play your best with these tee-riffic tips from our PGA-accredited professionals, Jack and Amelia.

1
1st Hole
Watery Challenge to Start the Round

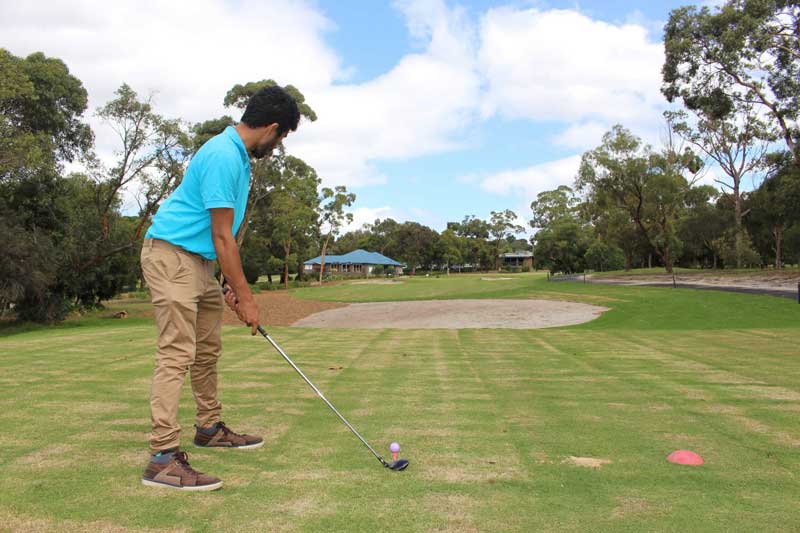
A challenging start for many golfers, Hole 1 features water hazards on both sides of the fairway, often leading to balls finding watery graves. Aim your tee shot at the right-hand side of the fairway to account for the right-to-left slope. Selecting a tree in the distance as your target can help with alignment and commitment. On approach, shorter shots are preferable as the green slopes from back to front, making a front pin position more accessible. Avoid the left-hand tree line, which is dense with foliage and features a creek, making recovery shots difficult. The new green is wide and inviting for an easier pitch towards the flag.

Short notes:

  • Avoid water hazards on both sides of the fairway.
  • Aim tee shot at the right-hand side.
  • Approach shots should be shorter; green slopes back to front.
2
2nd Hole
Uphill Battle with Bunker Defence

This uphill par 3 is guarded by bunkers on both sides of the green, with little room behind. Aiming for the middle of the green is the safest play, and it’s recommended to use an extra club to adjust for the elevation. Attack the pin confidently if you’re skilled with bunker recovery shots. If not, consider landing short of the green for an easier chip shot straight at the pin.

Short notes:

  • Uphill par 3; consider an extra club.
  • Aim for the middle of the green.
  • Bunkers guard both sides; minimal space behind.
3
3rd Hole
Risky Rewards on a Dogleg Right

This dogleg-right par 4 offers risk and reward. For conservative play, aim at the 150m marker on the left-hand side of the fairway to leave an open second shot. Aggressive players can cut the corner over the right-side tree line to shorten the hole. The double-tiered green requires precision, with the right side protected by a deep bunker and a false front that can punish short approaches. There is ample room on the left side of the green, so playing it safe here may still leave a good chance to salvage a score.

Short notes:

  • Dogleg-right; left-side tee shot is safer.
  • Riskier drives can cut the corner.
  • Double-tiered green with a false front.
4
4th Hole
A Short Test of Precision

A short par 4 with out-of-bounds on the right and fairway bunkers to consider. A tee shot just right of center avoids hazards and sets up a lower iron approach. The green slopes from front to back with an amphitheater of grass behind. Shots that are short and left of the green provide safer opportunities for scoring, while the left-hand drop-off can lead to trouble.

Short notes:

  • Avoid OB and fairway bunkers on the right.
  • Tee shot just right of center is ideal.
  • Approach shots short and left are safest.
5
5th Hole
Driveable Dogleg with a Strategic Edge

This short dogleg-right par 4 offers opportunities for longer hitters to take on the green directly. For a more conservative route, aim for the left-hand side of the fairway, which plays safer but may require a mid-iron approach over the left-side greenside bunker. The turf nursery running along the left-hand side adds an additional visual challenge.

Short notes:

  • Longer hitters can drive the green.
  • Safer play: aim left on the fairway.
  • Watch out for left-side green bunker.
6
6th Hole
Blast Away on a Straightforward Par 4

A short and straight par 4, this hole rewards aggressive play off the tee. Blast away with confidence as the ample fairway sets up a great scoring opportunity. Aim slightly left of center for the best approach angle. The green is shallow, so err on the side of short approach shots to avoid drop-offs behind.

Short notes:

  • Short, straight par 4; aggressive tee shot encouraged.
  • Aim slightly left of center.
  • Shallow green; avoid going long.
7
7th Hole
Uphill Challenge with a Tricky Approach

An uphill dogleg-right par 4, best played by keeping to the left side of the fairway due to the rightward slope. Approach shots are challenging due to a bunker on the left and a slope on the right. Playing on the high side of the fairway helps position for a better approach into this sloping green.

Short notes:

  • Uphill; aim for left side of the fairway.
  • Bunker left and slope right guard the green.
  • Accurate club selection is key.
8
8th Hole
A Long Iron Test with Subtle Risks

This long par 3 requires a well-judged tee shot with a long iron or wood. With no bunkers nearby, it’s better to land short than long as the green slopes back to front. While seemingly straightforward, the length and slight drop-off at the back make club selection critical.

Short notes:

  • Long par 3; use a long iron or wood.
  • No bunkers; aim short of the green.
  • Green slopes back to front.
9
9th Hole
Opportunity for the 'Big Hitters’

A straightforward par 5 where long hitters can reach the green in two. Blaze away off the tee to gain maximum distance. The green’s length requires checking pin positions for precise approach shots. A bunker on the right is the only major hazard to avoid.

Short notes:

  • Straightforward par 5.
  • Long hitters can reach in two.
  • Check pin position on the long green.
10
10th Hole
Birdie Chances on a Short Par 4

This short par 4 offers birdie opportunities. A tee shot aimed left eliminates the fairway bunker on the right. Longer hitters can go for the green directly, with only a small wedge required for the approach if played conservatively.

Short notes:

  • Short par 4; birdie potential.
  • Aim left to avoid fairway bunker.
  • Longer hitters can attack the green.
11
11th Hole
Strategic Tee Shot on a Dogleg Right

A dogleg-right par 4 that doesn’t require a driver. A 3-wood down the middle leaves a wedge into the green. Avoid the bunker on the right side of the green, and note the drop-offs on the back and left. The green can feed shorter shots up onto the surface, offering recovery opportunities.

Short notes:

  • Dogleg-right; 3-wood is sufficient.
  • Aim for the middle of the fairway.
  • Avoid right-side bunker and drop-offs.
12
12th Hole
Open Fairways and Big Drives Await

A par 5 that rewards an aggressive drive. Blaze away with the driver as the fairway provides ample room, and the adjacent 16th hole can offer recovery for errant shots. The green is simple to approach with no bunkers or tricky slopes, making this an excellent birdie opportunity.

Short notes:

  • Par 5 with ample fairway space.
  • Driver off the tee recommended.
  • Straightforward green.
13
13th Hole
Simple Yet Guarded: A Par 3 Test

A straightforward par 3 with bunkers guarding the right and back of the green. Shots aimed left or short still provide scoring chances. Approach the pin with confidence for a manageable par or birdie opportunity.

Short notes:

  • Straightforward par 3.
  • Bunkers guard right and back.
  • Aim left or short for safety.
14
14th Hole
Slopes and Hazards... But Make it Scenic

A straight par 4 with a hill and descent in the fairway. Aim tee shots to the right-hand side of the fairway to account for the slope. Approach shots into the green are best played to the right side, avoiding the left-hand bunker and water hazard.

Short notes:

  • Straight par 4 with a hill.
  • Aim right off the tee.
  • Avoid water and bunker on the left.
15
15th Hole
Slopes, Slopes, Slopes Ahead

A par 5 with a heavily sloped green. Straight tee shots down the wide fairway set up a third-shot wedge approach. Uphill putts are ideal due to the back-to-front slope, which can make downhill putts treacherous.

Short notes:

  • Par 5 with wide fairway.
  • Wedge approach for third shot.
  • Favor uphill putts.
16
16th Hole
Up the Hill to a Raised Green

A long par 4 that plays uphill. Driver is essential to maximize distance, leaving a long to mid-iron approach. The raised green demands precision to avoid run-offs on the back and left.

Short notes:

  • Long, uphill par 4.
  • Driver off the tee.
  • Raised green requires precision.
17
17th Hole
Final Stretch with Left-Side Challenges

A tough par 4 with a left tree line and fairway bunker to avoid. Aim for the right-hand side of the fairway, and approach shots should favor the right to avoid the severe left drop-off. Long shots off the tee are key to simplifying the second shot.

Short notes:

  • Tough par 4; avoid left hazards.
  • Aim right off the tee.
  • Avoid left drop-off near the green.
18
18th Hole
A Strong Finish on a Lengthy Par 3

This par 3 is slightly longer than usual and is protected by bunkers on both sides of the green. Aim slightly right to account for the slopes and ensure proper club selection. Shots short or long provide recovery opportunities due to the open layout.

Short notes:

  • Slightly long par 3.
  • Bunkers guard both sides.
  • Aim right to adjust for slopes.
Skip to content